Friday, December 30, 2011

Happy New Years

Happy New Years Everyone! Christmas was a whirlwind with family, friends and lots and lots of food. Every year with the hustle and bustle of parties, presents, and parcel post I wonder if I'll get it all done. This year especially... because I got an early Christmas present and didn't know if I could mange it all.  (more on that later!) Luckily everything came together with alot of help from my hubby!!

The only thing missing from my recap was the Christmas Quilt I made for my Mom and Dad. I was literally finishing the binding Christmas morning before they came over to see the kid's presents. I finished it by the skin of my teeth, but they loved it and I couldn't have been more happy with the results. Picture of the quilt to come.

Here is just a recap of our Christmas week and I hope you have a fantastic 2012!

No presents under the tree until Christmas morning.
BIL Rob and hubby!

New shiny plastic presents
Traditional aebleskiver Christmas breakfast: recipe here
Mom's world famous chocolates ~ or at least famous in these parts.

Christmas Break wouldn't be complete without one of these famous ice cream cones from JCW's.


post signature

Tuesday, December 13, 2011

Apple Upside Down Cake ~ Mid Week Munchies

I knew when I put my Mom in charge of the desserts at the Quilt Retreat last month they would be a smashing success and this cake from King Arthur Flour didn't disappoint. It was a weekend favorite. Enjoy.

Recipe and Picture from King Arthur Flour


Topping:
2 medium apples

4 tablespoons butter
3/4 cup light brown sugar, firmly packed
2 tablespoons boiled cider or thawed apple juice concentrate
1/4 teaspoon ground cinnamon
1/2 cup light corn syrup

Cake:
3/4 cup vegetable oil
1 cup brown sugar, firmly packed
2 tablespoons boiled cider or thawed apple juice concentrate
2 large eggs
1 1/2 teaspoons ground cinnamon
1/4 teaspoon ground ginger
1/8 teaspoon ground cloves
1/2 teaspoon salt
1 teaspoon baking soda
1 1/2 cups King Arthur Unbleached All-Purpose Flour
1 large apple, peeled and finely chopped
3/4 cup chopped pecans or walnuts, optional

Directions
1) Preheat the oven to 350°F. Lightly grease a 9" round cake pan at least 2" deep. The success of this cake hinges on the right kind of pan. Line the bottom with parchment, and grease the parchment.

2) Slice the top, including the stem, off one of the apples and set it aside before peeling and slicing the rest of the apples into 1/4" thick wedges.  Place the apple top, stem side down, in the middle of the pan, and overlap the rest of the apple wedges in a ring around it.

3) Prepare the topping by heating the butter, sugar, boiled cider, cinnamon, and corn syrup together over low heat, stirring until the sugar is dissolved.

4) Pour 1/2 cup of the syrup mixture into the prepared pan, and set the rest aside.

5) To make the cake: Beat the oil, brown sugar, boiled cider, eggs, spices, and salt together for 2 minutes at medium speed

6) Mix the flour with the baking soda, and stir it into the batter.  Add the chopped apple and nuts, and mix until just blended.

7) Drop scoops of the batter atop the apples in the pan, gently spreading to cover.

8) Bake the cake for 50 to 55 minutes, or until a cake tester inserted near the center comes out clean.

9) Remove the cake from the oven, and run a thin spatula around the edge to loosen. Let the cake cool in the pan for 5 minutes, then turn it out onto a serving plate, bottom side up. Scrape out any sauce that remains in the pan, and spread it over the cake.

10) Reheat the reserved topping. If butter starts to separate as you reheat, add water by the teaspoon and stir until the butter rejoins the rest of the sauce.  Pour the sauce over the cake. Serve cake warm or at room temperature, with whipped cream if desired.


post signature

Monday, December 5, 2011

Handmade Holiday Swap


Before Turkey Day I signed up to be apart of Susan and Kersey's "Holiday Gift Swap"  I thought it was a great idea and I super way to get some exception handmade gifts crossed off my list. I wasn't sure what I wanted to make but I knew it would involve fabric, quilting and something use-able. The day before I was suppose to send my "gifts" in the mail... I finally settle on an idea: drink coasters and as quick as I had decided I changed my mind again: table runner.

I was put into a group with 6 other artists and just going off our #'s there was at least 178 participates. Pretty cool! I was #8 so I don't know if I signed up really early or they went alphabetically. I know I am late sending my gifts {Dec. 1st} was the deadline, but luckily I have only received one "gift" {thanks Joy} so maybe because of the holidays were all a little late, right?

These beauties are being delivered to the post office today when Mr. H wakes up from his nap.
 I was inspired to make the Trees after Maggie's  table runner from the Retreat. The trees and borders came together really fast, but the binding was a beast. I hate doing bindings. I loved the hand stitching embellishment of the bakers twine. I think it gives a "Christmasy" feel without over dueing it.
 I had enough fabric to make 4 identical runners and 1 I had to use different fabric. I went a little out of my comfort zone and tried to design a runner that was a little more sophisticated and not so cutesy Christmas. I hope the ladies really like them.

Linking up:


post signature

Wednesday, November 30, 2011

Santa Postal Pouch {Tutorial}


Can you believe it? Tomorrow is December 1st!! I've got my Christmas decorations up, were getting our {fresh} tree this weekend, advent calendars are ready to go and Bing Crosby is singing as I type. I'm just bursting with Christmas Spirit this year and I wanted to share a fun tutorial just in time for you little ones to send Santa their wish lists! I am calling it: Santa Postal Pouch. It is so cute. Have your kids write their letters and end them via North Pole Postal Pouch Mail. I can't wait to see my kids faces when Santa sends a letter back and leaves it in the pouch. Oh, the magic of Santa!

Here's the easy tutorial. 

Step 1: Cut Fabric. 
Cut 2 squares measuring 10 1/2 x 10 1/2 {outer fabric} and then cut 2 square measuring 10 1/2 x 9 1/2 { 9 1/2 measurement needs to be the bottom of the square. inside fabric}
Cut 1 square measuring 11 1/2 x 11 1/2 and cut in half to make a triangle. {pouch flap} 5 total pieces of fabric.


Step 2: Pouch Flap
Fold your triangle right sides together {I realize this picture isn't right sides together, sorry!} in half. Iron. to mine I added a little bit of dingle ball fringe, but do whatever you prefer. Sew right sides together sewing  shorter side of triangle with 1/4" seam allowance. Turn right side out and iron. Leave long side of triangle unsewn.

Step 3: Making Pouch
Match your outside fabric with your inside fabric {x2} right sides together and sew top of fabric. Add your flap pouch to one of the squares sandwiched in between the fabrics. {note: bottom of inside fabric is 1" shorter} Iron. Match like fabrics right sides together and sew 1/4" around entire pouch. On inside fabric leav a 4" opening to turn fabric  Flip pouch right side out, iron and sew pouch opening closed.
Step 4: Finishing Up
Iron and lay flat. Making sure your corners are pointed. Tuck inside fabric into pouch and flip your flap!
Step 5: North Pole Tag
I added a little hand stitched North Pole Tag with NearSea Naturals organic embroidery floss {fire red}and wool felt . I also thought of a few other tag lines: "Polar Express", "Express Delivery to Santa", "Santa's Mail", "For Santa" ~ you decided. I am making a few of these for family and friends and will probably change up each tag to say something different.

Have your kids tuck their wish lists into the pouch for Santa. I thought it would be cute to leave it by the fireplace, have it disappear for a few days and then re-appear with a message from Santa or one of his elves with a treat.

Linking up: Blue Cricket Designs


post signature

Monday, November 28, 2011

Dresden Plates


Before the Thanksgiving holiday, I set a goal for myself to work on  my Dresden blades every night while my family was away. I set up my table and sewing machine in front of the T.V. and happily sewed into the wee hours of the morning (2 a.m in fact!) I was able to make 5 blades during the Retreat and need to make 15 more. My plan for my Dresden quilt is 4 across and 5 down.
The two nights I worked, I actually timed myself to see how long from start to finish it took me to make each plate. I quickest I got it down to was 13 mins. Whew! I watched alot of old movies while I made the plates: 3:10 to Yuma, Forest Gump, Shawhank Redemption.
 I've completed 15 so I only 5 more to go. I loved my "Fall/Thanksgiving" theme this quilt is so scrappy. I have about 45 fabrics different fabrics. For the borders I have this amazing Alexander Henry "plymouth" fabric I am going to use for the borders. It is perfect. 

Now that Thanksgiving is over I am planning to put this quilt away for a while and work on Christmas project/presents. I mean...I technically have a year to finish this quilt if I want it ready for next Thanksgiving.  

 WIP Wednesday at Freshly Pieced
 
post signature

Friday, November 25, 2011

Emily Herrick {Crazy Old Ladies} Trunk Show

It's been a week since the quilt Retreat and I am still daydreaming about the beautiful quilts we saw over the weekend. I was able to take some pictures of the quilts Emily showed at her Trunk Show, she did a lovely job of showing her quilts, patterns and fabric. There were so many ooohs and ahhhs, ee were spoiled rotten! Thanks Emily.
This was my favorite quilt of all. I love the white with the "waves" machine quilting. The fabric is from her Going Coast Line she designed for Michael Miller.
I can't wait for her "Hall of Fame" line of fabric to come out early next year. I want to make matching quilts for my boys bed with her Pep Rally pattern. (Far right quilt)
Handmade Hexagons with Hand Appliqué. Her machine quilting is amazing...she is so talented.
Emily's pile of quilts! The one on top is "Urban Life". Check out Emily's Etsy Shop to buy patterns and quilts.

For more posts about the Retreat check out these blogs:
post signature

Wednesday, November 23, 2011

Happy Thanksgiving


Growing up I remember traveling to Idaho to my grandparents farm to spend Thanksgiving with my cousins. I remember pies and rolls and lots of laughing. When everyone's families got too big we spent Thanksgiving at home. In junior high and  high school I would run in the ORRC Turkey Trot Race on Thanksgiving morning.  It was a good way to start the day off healthy even if the day didn't end that way. 

I am a firm believer that Christmas doesn't start until the day after Thanksgiving. Alas, I feel like I am in the minority, Thanksgiving is such a great holiday...why do we have to treat it like an ugly stepchild to Christmas. Even though no one agrees with me (commercial and half my neighbors already have their Christmas lights up!) N.O. tinsel and trimmings until after Thanksgiving.

Thanksgiving night, my husband is taking our 2 older boys and spending the weekend in So. Utah. AHHHH, a weekend to myself (well, I'll still have Mr. H) to get some much needed things done.  On my to-do list:
  • Baste and machine quilt this quilt and this quilt.
  • Decorate for Christmas.
  • Organize the downstairs pantry. It is in desperate need of some TLC.
  • Get caught up on some blog post tutorials I have been meaning to write.
  • See Breaking Dawn.
  • Work on Dresdans
I'll slowly add to this list if I can start getting things crossed off. Happy Thanksgiving and safe travels. Gobble Gobble!


Peppermint Dessert ~ Mid Week Munchies

I couldn't have been more pleased with how the meals turned out during the Retreat. I have to admit I was really stressing over what to make, how to prepare it and if everyone would like it. I had a beautiful kitchen to use during the retreat at Ivory Ridge but it lacked a oven and stove top. So I had to be creative. I relied heavily on my crockpots and my best arsenal in my kitchen: my Mom! She is an amazing cook and was an even better sous chef last weekend. I couldn't have done it without her!!

With the encouragement of the attendees I am sharing all the recipes from the Quilt Retreat. First up: Peppermint Dessert. This has been a family favorite for as long as I can remember. My mom would make it around the Christmas holiday and because it is a no bake, it is a great make ahead dessert.

Enjoy!

Peppermint Dessert:

I make this recipe using two kitchen appliances: my Kitchenaid and Cuisinart. I loved the layer look and I also love that this dessert is no bake. Just out of the freezer and into your mouth. Yum!!

Crust: 2 cups crushed Nilla Wafers
1 cube of Butter (melted)

Don't skimp on the butter. The wafers need to be really moist and soak up all the butter in order to make the layers work. Also, I crush my wafers in my Cuisinart. Place wafers in the bottom of a 9 by 13 pan. Spread and pat with a fork evenly across pan. Place in fridge to start freezing while you make the chocolate.

Chocolate:
1 cup butter or two cubes (softened)
2 cups powdered sugar
6 egg yolks
2 oz. semisweet chocolate (melted)
1/2 cup crushed walnuts


Beat softened butter and powdered sugar until creamy. Add egg yolks and beat again. Because you don't cook this dessert, make sure you don't have any lumps of butter. Melt chocolate in microwave and add, beat again. Fold in walnuts by hand. Layer on top of wafers. Place in fridge to start freezing while you make the peppermint.


Peppermint:
2 cups heavy whipping cream (whipped)
3 cups mini marshmallows
1 cup crushed walnuts
1/2 cup crushed peppermint

Beat cream until cream holds shape, dot not over beat cream because you will do some stirring by hand, so just watch your cream while mixing. I use my Cuisinart to crush the peppermint. I mix the peppermint to a very fine texture, almost like powder. Then fold in marshmallows, nuts and peppermint. Stir until just mixed. Layer on top of chocolate. Place in fridge until hard. About 6 hours, if freezing overnight cover with tin foil.
post signature

Tuesday, November 22, 2011

Quilting Retreat Recap

(Maggie's sewing machine)

Now that I've come up for air...and the Quilting Retreat is finished (sigh*) I have lots of photos to share over the two day retreat. The Quilting Retreat in a nutshell was phenomenal and it was all possible because of the ah-mazing ladies who quilted and the inspiring projects they worked on. I am already planning next years Retreat, so stay tuned for dates!

I wish I had taken more photos and "caught on camera" ever special moment. Here are just a few of my favorites:  
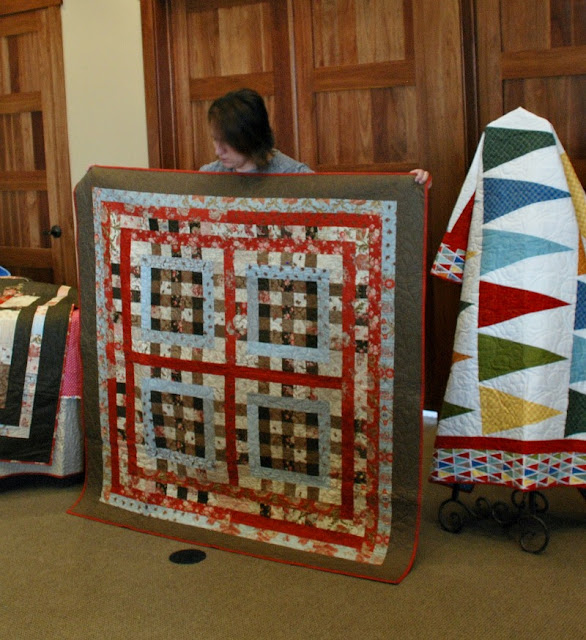
Kristen working on her bed quilt. (I know this picture is out of focus!) But I loved it anyway. She worked on a denim jean and upholstery quilt from scraps. Once it was all put together the pinwheels were amazing. 
Maggie working on her table runner swap. This quilt's new home will be all the way in the Shetland Islands. The houses and trees are paper pieced and with such great modern fabrics it will surely become an heirloom.
Christmas projects were everywhere! This one has been six years in the making!
April's scrap bag... I so need one of these. So handy and cute. The ladies had such fun tools, I am adding this bag to the top of  my to-do list of projects. Maybe if I had this bag, my scraps wouldn't make such a mess on the floor!
.
I even worked a little on my Dresden blades. With cooking, CHATTING and admiring everyone else's projects it is a complete wonder I got anything done. Note to self: need to learn how to quilt at my own Retreat.
post signature

Thursday, November 17, 2011

A little peak....


I've got a million things to get done today for the Quilt Retreat tomorrow. I am so excited it is almost here!! It is going to be an ultra inspiring weekend. Here is just a little peak into a couple "surprises" I have been working on for the attendees. Too fabulous!!

 I'm calling these my "envelope bags" so easy! Next week I'll have a tutorial to make some yourself.
Half Dresden zipper pouch. This beauty measures 14" by 8" perfect for a small sewing or knitting project.

post signature
Blog Widget by LinkWithin