Thursday, September 29, 2011

Fried vs. Baked ~ Mid Week Munchies


Fried vs. Baked the great debate! or maybe just a debate for my taste buds to settle. Yesterday, I made 2 baked doughnut recipes and taste tested them. Now, we all know what a hugmongus fan  I am of doughnuts!  I have my favorite locals joints Banbury and Daylight to which I am a frequent customer. I've even made my own spudnuts at home. But, I've never tried baked doughnuts until.....yesterday.

And I am not going to beat around the bush:  I was so disappointed. Baked doughnuts just don't do it for me. They look pretty, but they don't hold a candle to fried. Since I bought the donut pans, just to try them out, I'll need to find another use for them.
Thoughts?                                                                                                             post signature

Monday, September 26, 2011

Giant Pumpkin Wreath


I am in love with all the coffee filter wreathes currently floating around the blogosphere. I wanted to try my hand at making one myself. I knew if I used tea bags I could make the coffee filters a yummy tan ~ perfect for fall. But I decided to take it one step further and try to dye the coffee filters a color. The only thing I had on hand was food coloring, so I thought lets try it! Yes, this giant pumpkin wreath is made with food coloring coffee filters!!

Here's how I did it:
I filled my sink with coffee filters and added just enough water to cover the filters. I then added the food coloring, I knew I wanted a high concentration of color so I used as little water as possible. I used Wilton's Orange food coloring in paste form. I prefer paste whenever I use food coloring. You can control the amount used so much better than drops. I used about half the bottle.

To be honest I had no idea if this would work, but I was amazingly surprised because IT did. You have to let the filters soak for at least 2 hours in the water. If I hadn't needed to use my sink I would have left them all day, just to see how orange they could get.
I wrung out my filters and left them in the sun to dry. It took several  hours for them to dry completely.
After I prepped my wreath by wrapping it in muslin, I formed and hot glued my "scrunch-ied" filters to the wreath, after about a half an hour of "scrunching" and gluing and I was done. When my 6 year old saw it, he exclaimed "...it's like a giant pumpkin!". After that I knew just how to proceed with the rest of the wreath.
I made the stem from a scrap of cardboard, painted it and hot clued it to the back and glued a few green pipe cleaners as vines. The pumpkin wouldn't be complete without a giant spider and a few spooky webs... so I added those as well.

And the best part is: I got everything at the dollar store. This wreath cost me around $3.00 to make. Dollar store items:
Wreath
Coffee Filters
Spider
Everything else I had around the house:
Food Coloring
Muslin
Spider Webbing
Cardboard 
Pipe Cleaners

I absolutely love the color of the filters. They have a bit of a tie dyed look which is way better than just orange tissue paper, plus the filters really held up to getting wet, food coloring, drying, scrunch-ied and then glued. I've never seen tissue paper do that!!

This is such a kid friendly craft, my boys and I had a great time making it!! I am thinking a green wreath for Christmas would look fantastic.

Linking:
post signature


Saturday, September 24, 2011

One More Gift


I've got a busy weekend. Canning, baby shower, soccer and date night! I hope everyone has a great weekend. October is almost here, yippee! I bound Holly's Quilt and made a few burp clothes for her. BUT, I had to do it sans a thimble. I have 2, but they are both MIA. It is beyond annoying  and slow binding a quilt without a thimble. Grrrr. I've got alot of quilts I am currently working on, but I would be so much more productive if I would clean my quilt room AND I would probably find a thimble in the process. Add that to the list.

xoxo,

post signature

Wednesday, September 21, 2011

Canning Peaches ~ Mid Week Munchies

 This morning, I took these empty jars and turned them into....
These! My SIL showed me the ropes and I couldn't have done it without her. Peach Variety: Lemon Elbertas.  What have you been canning lately?

post signature

Monday, September 19, 2011

My Turn at Modern Quilting


Over the weekend I hosted a baby shower for my good friend Jenn. She is having her third girl in about 6 weeks and after a hard miscarriage (right before getting pregnant) I thought we needed to celebrate. Jenn is an extremely, creative, talented gal. I feel so blessed to have such inspiring friends. When I was pregnant with H, she knitted me a gorgeous baby blanket. Because she was so generous with her talents,  I wanted to make her a special baby quilt. I wanted to do something really different that pushed me out of my comfort zone: modern quilting.

This is my take on Modern Quilting. I feel like modern quilting has become so popular. Quilter's inspiration is changing and the look and feel of quilts and fabrics are moving in a more modern direction. I want to try my hand at some modern looking quilts. 

I love this shot, it really shows the color variation.(above) I colored the fabric, (they were originally king size white sheets) at the rit dye party. I cut the sheets into three pieces and dyed them in pink/coral colors. Although at the time I thought the 3 colors were in larger contrast from one another, once washed and dried the sheets were very subtle in color variation. The colors are so slight it is really beautiful when pieced together. 
I chose three words to embroider: baby girl, bebe (french) and noelani (Hawaiian) I also embroidered a simple balloon, 3 hearts and xoxo. I found the back in my stash and it was the perfect compliment "Fleurish" by Valori Wells for Free Spirit. I did simple lines of machine quilting so the embroidery wouldn't get "lost" in the shuffle of enjoying/viewing it. 

I love modern quilting, and it was a fun first attempt. I think I'll always love classic quilting (whatever that means!) but I wanted to branch outside the box and stretch my creative self. Which do you prefer? Modern or Classic?

Linking Up:

post signature

Thursday, September 15, 2011

9 Patch on Point


Three weeks ago I was having trouble with my machine. My electronic screen would randomly stop working and so would the needle.  I took it in to the Bernina store where I bought it 5 years ago and they told me there was a recall on a specific part that was causing the problem. They told me the part had to be ordered and it would take a week. ACK! A WEEK! I didn't want to be without my machine for a week?! Me, not having my machine for a week would be like not having my toothbrush, or my shoes. (This is when I realized I really need a back-up sewing machine, in case something like this happens again)

Well, one week turned into two and two weeks turned into THREE! I was beside myself. Three weeks without my machine; I was practically having fits. Giving my friends and family updates on how long it would take before I got my machine back. I was being so obnoxious, looking for sympathy from anyone?! Apparently this recall has caused some pretty major havoc and the part was on back order. Three weeks!

Once I got my machine back, working good as new; thank you! I started working again on my on-point quilt. The nine-patches and black blocks just needed to be sewn into strips. On-point is a little tricky (for me) because your working sideways the whole way until the quilt top is finished and then is comes together and makes sense as a rectangle.
I am thinking I will add a 4" black border and be done. For 2 reasons: I got all the fabric prints from my SIL and I don't have anymore fabric to do a colorful border and I want to machine quilt it myself and it will be much easier to tackle in its current size, rather than 24" bigger.

Anyone out there had machine trouble and no back-up? I can sympathized, tell me your tale!

post signature

Wednesday, September 14, 2011

My Top Ten ~ Mid Week Munchies

I thought it would be fun to share My Top Ten favorite places to eat in Utah. Now this list is not the best food in Utah or the best price; this is MY TOP TEN favorite places to: eat, indulge or just plain satisfy my sweet tooth. Once I started compiling my list is was really hard. I love so many places. But I'm satisfied with my current Top Ten.

I have to admit I haven't tried every place in Utah. I am sure there are some amazing places I don't even know exsist. I've included 5 sit down restaurants, 2 order at the front, 2 doughnut shops and 1 sweets store. If you think I created a grevious sin and didn't include someplace. Let me know!

~ garlic chicken and katsu, my faves! also, order some fry bread (donuts,people!!)


~ while pregnant with our first child, once a week before lamaze class, DH and I stopped and ate. double souvlaki plate with lemon grass. Oh.....and the fries and fry sauce just can't be denied.

Really people!....the first time someone told me about Banbury she explained the donuts as oooey, gooey delicious. Man, was she right!


The Dodo Restaurant
The turkey sandwhich with melted cheese and ceasar salad is like heaven and you must order a desert: preferrably the tollhouse pie. I repeat: order the tollhouse pie.

I have been on a rampage lately at this fine establishment. They are pricey donuts but sooooo worth it. My fave is the maple honeybun!

They have the most amazing chocolate strawberries. I use to live about 200 feet from this place and was know on many occasions, after a hard day at work, to stop by and treat myself to a chocolate strawberry!

I've never been to Thailand, but if the food is as good as Thai Ruby then I want to go. The curry is incredible and so it the pad Thai. Nothing is better than Thai Ruby (in my humble opinion)

Fresh, local, homegrown and every bite is mouthwatering. We always go for Christmas, because that is our anniversary. The menu always changes, but I love the roast beef!

My husband's parents first date was here. It has a very swanky bar, without being a bar, feel. Everything is delicous but I love the sausage sandwich, and its spicy!!


Best Burgers in Utah. We have two locations all within about 10 minutes. My last meal before I went into labor was at JCW's and I ate a whole plate of cheese fries ~ all by myself. Oh, y-e-s I did!!
post signature

Tuesday, September 13, 2011

Local Artist Collaboration


Last Spring I had the most wonderful vendor, Birds of AshMae, at the Tom and Lucy's Art Shoppe. I loved her water color prints, cards and I even snagged a delicious bird garland at the shoppe! I special ordered an 11 by 14 print of the temple my husband and I were married in. {I'm LDS)   As soon I recieved the print in the mail, I knew I need to get in contact with Melissa and have her add some calligraphy.

Isn't Melissa amazing? I am just addicted to her calligraphy. For Valentine's day she also created this for me.  The spire of the temple left ample room for our sweet wedding info to be added. I am so in love with it.

I love using local artists and their creativiness is so inspiring. These amazing women are moms, wives and artists ~ all rolled into one!


post signature

Friday, September 9, 2011

9/11 Hand Print Rememberance


I can still remember exactly where I was when I heard about the attacks on the Twin Towers in Manhattan. I've never visited N.Y. but I knew what the twin towers looked like. I was driving in my car to work. I was listening to what was suppose to be a morning radio music station. As I heard the D.J. trying to explain: an airplane has hit the World Trade Center, the best word to describe was shock. I was pregnant with my oldest {I only had about 6 weeks to go} and I realized at that moment, both our lives would never be the same.

I remember sitting at my desk at work, literally stunned by what I was hearing on the radio and seeing on the Internet. Even though I was far away from New York City, I was emotional and it was gut-wrenching to know Americasns were victims of terrorism in an unimaginable way.

Sunday, marks the 10 year anniversary. Over the last couple weeks my mind has lingered on 9/11 and what it means to me to be an American, a Mother and Freedom. I especially wanted my kids to understand how living in the United States of America is not just a gift but a privilege and I wanted to remember how young they really were on the 10 year anniversary.

I made a 9/11 Hand Print Remembrance.

How I Made It:

I look some extra matting from {this project}. I knew I wanted something heavy and sturdy. I painted their hands, the older boys had no problem doing their hand prints, but little H. was tricky. He was laughing at me trying to pry open his hand for the print. The practice prints actually turned out better but, in the end this was the best I could get. It will be a fun memory!

I used an extra set of scrabble tiles for the words and let my oldest fill in 9/11/11 on blank tiles. I used bakers twin to give the words continuity. I also let them write their names by their hand prints. 

God Bless America, my home, sweet home.

post signature

Thursday, September 8, 2011

Strawberry Stitching

My Mom brought this down to me this past weekend. She knows how much I love strawberries. I just flipped over it. It is absolutely breathtaking in person. The stitches and quality of work is amazing.

Right by my parents home in Oregon is an antique mall, (I wish we had something similar here in Utah) where vendors sell antiques of all varying decades and description. I have been know to get lost for hours browsing the vendor booths. She found this little gem and snatched it up; for get this: $8!! Something about the price makes me love it even more.
 The woven basket is so intricately stitched and the color choice variation is perfect.
I would love to know what kind of yarn was used. The knots and stitches give a little puff to the strawberries. They have a roundness and dimension that is darling!
The attention to detail is amazing, nothing was missed, even the strawberry blossoms are captured.
post signature

Wednesday, September 7, 2011

Chocolate Zuchini Cake ~ Mid Week Munchies

With all the zucchini around my house this cake was calling to me. I love the zucchini and chocolate combination. It is just perfect with just a little dash of powdered sugar. It is a family favorite.
Chocolate Zucchini Cake

2 cups zucchini (grated)
1 3/4 cup sugar
1/2 cup margarine
1/2 cup oil
1 cup buttermilk
2 eggs
*mix all wet ingredients in a large bowl

2 1/2 cups flour
1 teaspoon soda
1/4 teaspoon salt
1/4 teaspoon cinnamon
1/4 teaspoon cloves
4 tablespoons cocoa
*sift all dry ingredients and combine with wet ingredients

Pour in to a greased/floured 9 by 13 pan. Sprinkle 1/2 cup of nuts and chocolate chips over top of batter.

Cook at 350 degrees for 30-35 minutes.

Linking up at:


post signature

Tuesday, September 6, 2011

Local Quilt Show

Last Wednesday night I went to an end of summer quilt show, put on by American Quilting (LQS) with my friend Ella. American Quilting is a great store with amazing quilts and fabric, if you are ever in Orem, Utah you really have to stop by. {They also have a super sale section}. Hard to believe, but they put on an even better quilt show. The show was in the owners beautiful backyard and they served ice cream sundaes to all the guests. I would say there were about 50 quilts in all. I submitted three quilts, myself. Ella's hexagon quilt was hanging from the roof of the home, in a place of honour, it looked beautiful hanging there.
Here is me with my propeller quilt. Can you see my adorable strawberry bag? Ella made it for me {for my b-day}.
A few more photos of the night.
There was even a quilt with the same propeller block as mine. This quilt was baby size and had a nautical theme. The quilter even put little yo-yos in the center black. I just loved it, perfect for a little boy!
 post signature

Thursday, September 1, 2011

How to Professionally Clean your Blinds

September 1st, WOW!  Although it is still pretty hot here, the nights are cooling off, the sun is setting earlier and our garden is producing an abundance of veggies.  School is back in session, first week of kindergarten, homework, soccer games and I'm ready for Fall.

I'm not sure what it is, but I've had the itch lately to clean, organize, de-clutter and tackle a few projects I've been trying to hide from. a.k.a. Clean the Blinds. My husband is a superstar at these projects. He is always on board (pretty much a neat freak, he is.) and does the job right.

For years now, we have tried different "techniques" to clean our blinds, but we haven't been very pleased wth the results. Most people in our neighborhood, just pay to have them cleaned. Now, this is a great idea, but not in the budget.

Last spring, our neighbor (who is from Boston and an engineer) came up with a fantasic technique to clean blinds. It was genius! So a few weeks ago, we cleared a Saturday and cleaned all our blinds. Other than having to clean 20 blinds it was easy and the results where beautiful.

What you need:
2 Ladders
You need two ladders, preferrable about the same size. We borrowed an extra ladder from our neighbor.
Long Board
This connects the 2 ladders and where you attach the blinds.
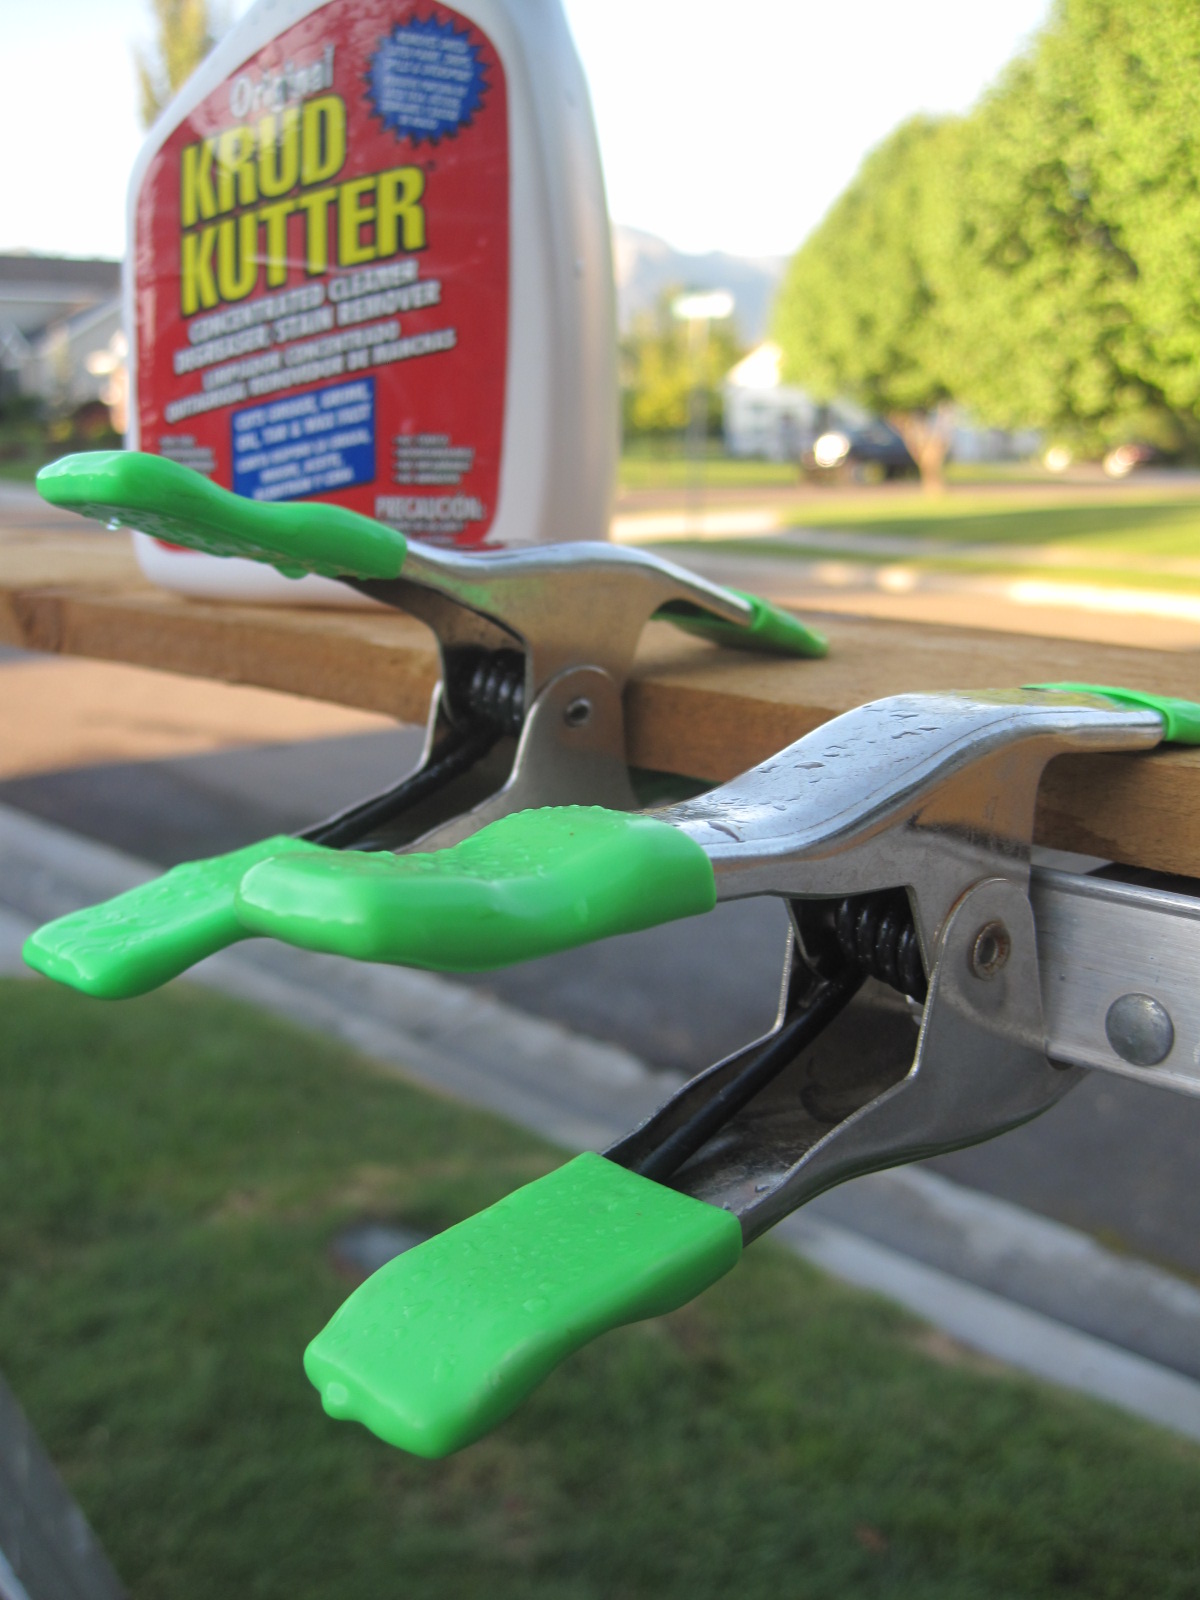
Two heavy duty clamps
Keep blind secure to board while cleaning.
Super Spray Cleaner
Your going to spray this cleaner all over your blinds.
Water
We used our outdoor hose.
Power Washer
This is very handy, we don't own one, but borrowed it from our neighbor. I know you can also rent power washers from Home Depot or Lowes.

Set-up:
Place ladders blind-width apart. Lay board across the top of the ladders. Attach blinds to board with clamps. Attach hose to power washer.

Technique:
Spray blind with water to remove dirt and dust. Then, spray entire blind with cleaner, front and back, paying close attention to the pulls (which are always the dirtiest). Re-spray blinds with water, washing away all of the cleaner. Blinds with be clean and sparkly, even the pulls which were so black and grimy.
Since the blinds were wet after washing, we layed out a towel and let the blinds dry on the towel for 20 mins or so.  

It is time consuming, but the time vs. cost to pay someone else was so worth it. Plus, we didn't have to wait 3 days to get our blinds back. After we were all done, we went to dinner and when we came back my house smelled and looked so clean and fresh. No more dirty blinds for us, we are planning to do this twice a year.

post signature

Blog Widget by LinkWithin