


Can you believe it? Tomorrow is December 1st!! I've got my Christmas decorations up, were getting our {fresh} tree this weekend, advent calendars are ready to go and Bing Crosby is singing as I type. I'm just bursting with Christmas Spirit this year and I wanted to share a fun tutorial just in time for you little ones to send Santa their wish lists! I am calling it: Santa Postal Pouch. It is so cute. Have your kids write their letters and end them via North Pole Postal Pouch Mail. I can't wait to see my kids faces when Santa sends a letter back and leaves it in the pouch. Oh, the magic of Santa!
Here's the easy tutorial.
Step 1: Cut Fabric.
Cut 2 squares measuring 10 1/2 x 10 1/2 {outer fabric} and then cut 2 square measuring 10 1/2 x 9 1/2 { 9 1/2 measurement needs to be the bottom of the square. inside fabric}
Cut 1 square measuring 11 1/2 x 11 1/2 and cut in half to make a triangle. {pouch flap} 5 total pieces of fabric.

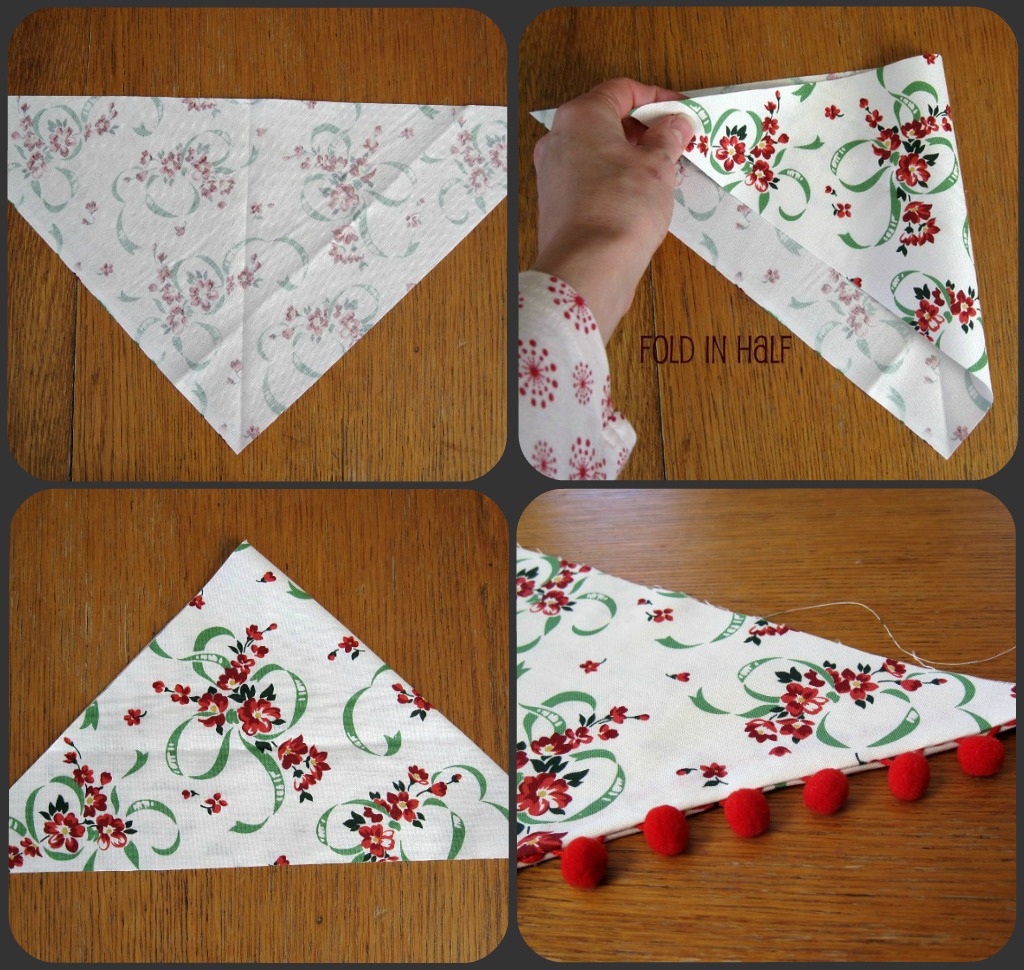
Fold your triangle right sides together {I realize this picture isn't right sides together, sorry!} in half. Iron. to mine I added a little bit of dingle ball fringe, but do whatever you prefer. Sew right sides together sewing shorter side of triangle with 1/4" seam allowance. Turn right side out and iron. Leave long side of triangle unsewn.
Step 3: Making Pouch
Match your outside fabric with your inside fabric {x2} right sides together and sew top of fabric. Add your flap pouch to one of the squares sandwiched in between the fabrics. {note: bottom of inside fabric is 1" shorter} Iron. Match like fabrics right sides together and sew 1/4" around entire pouch. On inside fabric leav a 4" opening to turn fabric Flip pouch right side out, iron and sew pouch opening closed.

Iron and lay flat. Making sure your corners are pointed. Tuck inside fabric into pouch and flip your flap!


I added a little hand stitched North Pole Tag with NearSea Naturals organic embroidery floss {fire red}and wool felt . I also thought of a few other tag lines: "Polar Express", "Express Delivery to Santa", "Santa's Mail", "For Santa" ~ you decided. I am making a few of these for family and friends and will probably change up each tag to say something different.

Linking up: Blue Cricket Designs


3 comments:
This is adorable! Thanks for sharing!
I love following your blog and I hope you will follow me back over at www.createdbycori.blogspot.com
Wow! Great tutorial!!! I Love that Idea, so cute!!! I extra love the hand stitches♥♥♥
Thanks for the idea it's really cute!
Post a Comment